Overview #
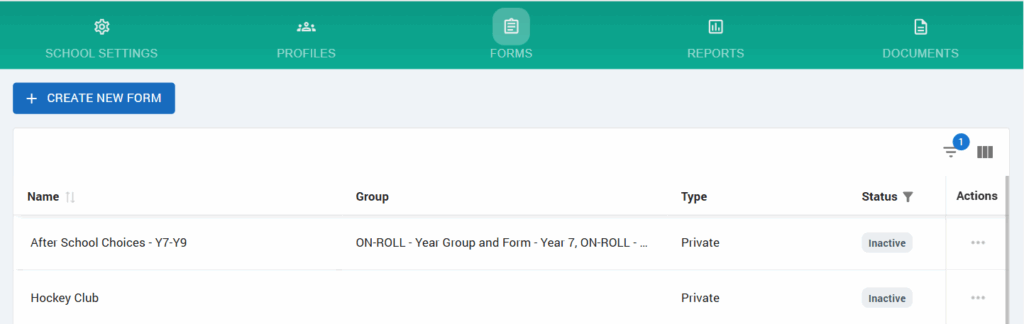
In the Forms tab, the “CREATE NEW FORM” button, located at the top-left of the page, allows administrators and members of staff to start the process of creating a new form. Clicking this button opens a form builder interface where users can define the form fields, groups, assignees, and other details.
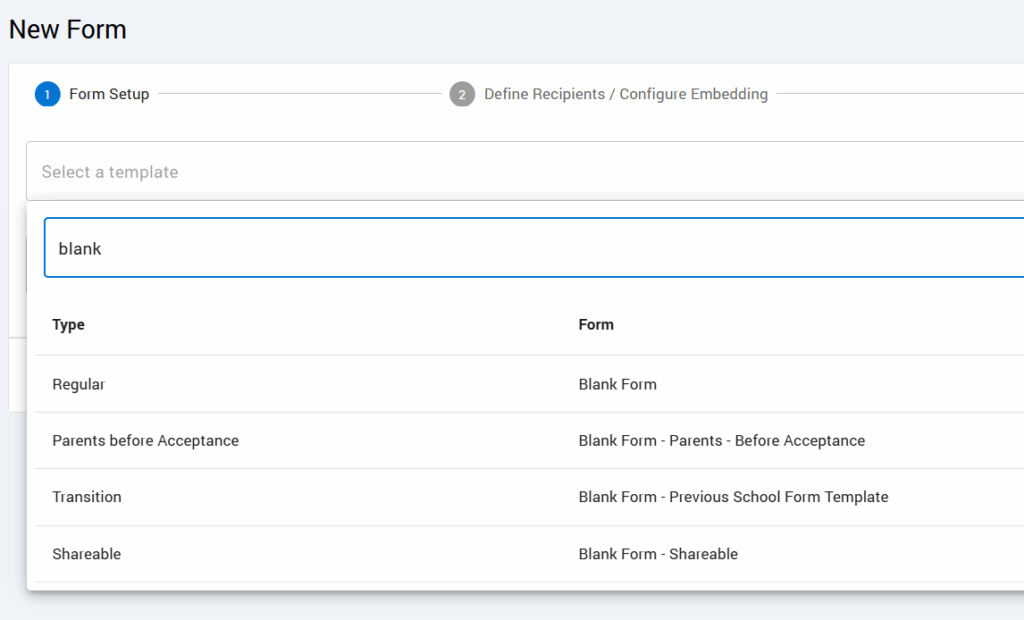
Form Template Selection #
Form Template Dropdown: Begin by selecting a template from the “Form Template” dropdown menu or type in a form name. This template serves as the foundation for your form and is mandatory for its creation.
Each template has a Type and this will determine which Audience the form can/will be sent out to after its created. Below is the mapping of each form type selection to its audience:
| Type | Audience |
| Parents before Acceptance | Parents |
| Transition | Previous school |
| Regular | None/Parents/External users/Students/Employees |
| Application | Publicly available |
| Shareable | Publicly available |
Step 1 – Form Setup #
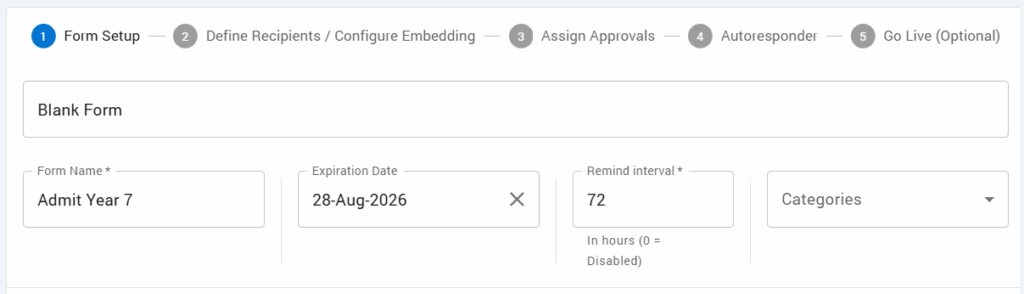
Form Name: Enter a descriptive name for your form in the “Form Name” field. This name will be displayed in the form list and used to identify the form.
Expiration Date: Use the calendar icon to set an expiration date for the form. This date determines when the form will no longer be available for submissions.
Remind Interval: Set a reminder interval in hours. This will send auto reminders to recipients who haven’t completed the form. Entering “0” disables reminders.
Categories: Assign a category to your form from the dropdown menu. This helps with organising and filtering forms later on.
Form Builder Components #
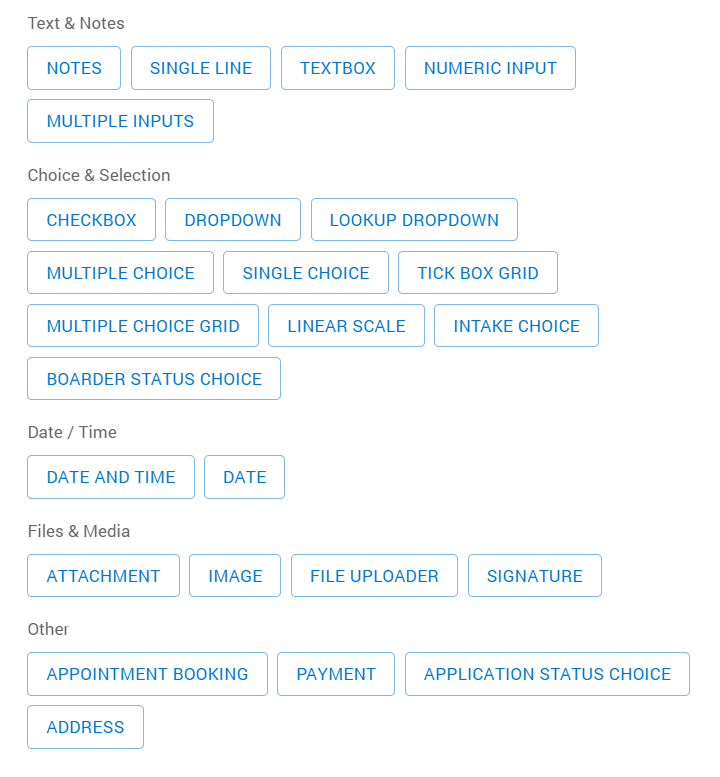
Form Components: Use the available form elements to design your form. Click on any element to add it to your form. Available elements include:
- Notes: Add a section for descriptive text or instructions to appear in the body of the email notification.
- Attachment: Allow users to upload files.
- Image: Insert an image into the form.
- Checkbox: Add checkboxes for multiple selections.
- Dropdown: Provide a dropdown list for single selection.
- Multiple Choice: Add multiple choice questions.
- Payment: Allows users to make a debit or credit card payment with Stripe.
- Signature: Include a signature field for digital signatures.
- Single Choice: Add radio buttons for single selection.
- Single Line: Insert a single line text input.
- Textbox: Add a multi-line text input.
- Tick Box Grid: Provide a grid of checkboxes for multiple selections.
- Multiple Choice Grid: Add a grid of radio buttons for single selections per row.
- Linear Scale: Insert a scale for rating or other linear responses.
- Application status choice: Change the application status on the form submission according to the configuration of this component.
- File Upload: Allows the form creator to attach documents for the recipient to download.
- Date, Date And Time: Add date picker with or without time to the form.
- Boarder Status Choice: Allows users to select the student’s boarding status (e.g., day, weekly, or full boarder), with customizable option descriptions.
- Intake Choice: Provides a selection of available intake terms or years (e.g., September 2025), with the ability to add custom descriptions for each.
- Lookup Dropdown: Dropdown list populated from a predefined lookup (e.g., title, gender), ensuring consistency and centralized data management.
- Multiple Inputs: Group of repeated input fields allowing the user to enter several values.
- Address: Composite input capturing structured address information including street, city, postal code, and country.
- Payment: Component for collecting payment-related details or confirming fee submissions in a new tab.Appointment Booking: Lets users choose and book from available time slots, typically used for scheduling interviews or meetings.
Preview Form:
Click the “PREVIEW” link on the right side of the form builder to see how your form will appear to users.
Save Form:
Once you have completed designing your form, click the “SAVE FORM” button at the bottom right to save your form. Make sure all required fields are filled out before saving. You can come back to the form later for completion via Form Settings or carry on with step 2.
Note: the form is not live yet and will not send out anywhere.
Step 2 – Define Recipients / Form Configuration #
After saving the form setup, proceed to the next step to define recipients. This step ensures that the right audience receives or has access to the form. There are five types of assignments.
The first four are:
- Parents – forms to be completed by the parent(s) on behalf of the child
- External Users
- Students
- Employees
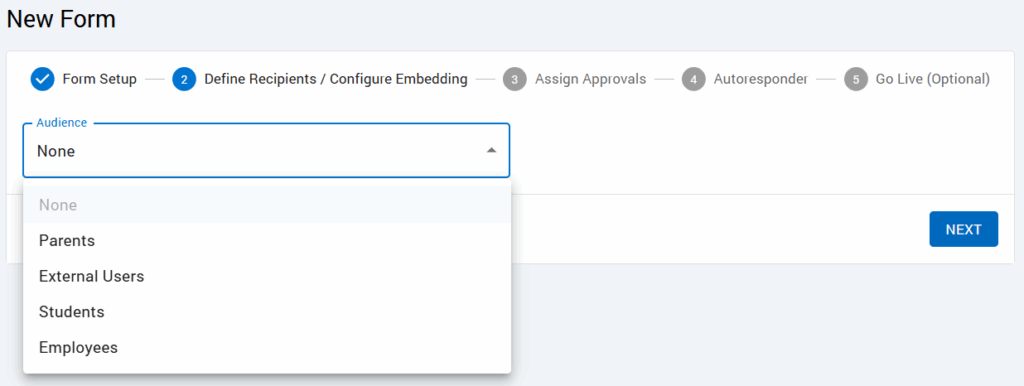
The last type is:
- Previous School – (Selection of template Blank Form – Previous School Form Templates) any form with Transiton type.
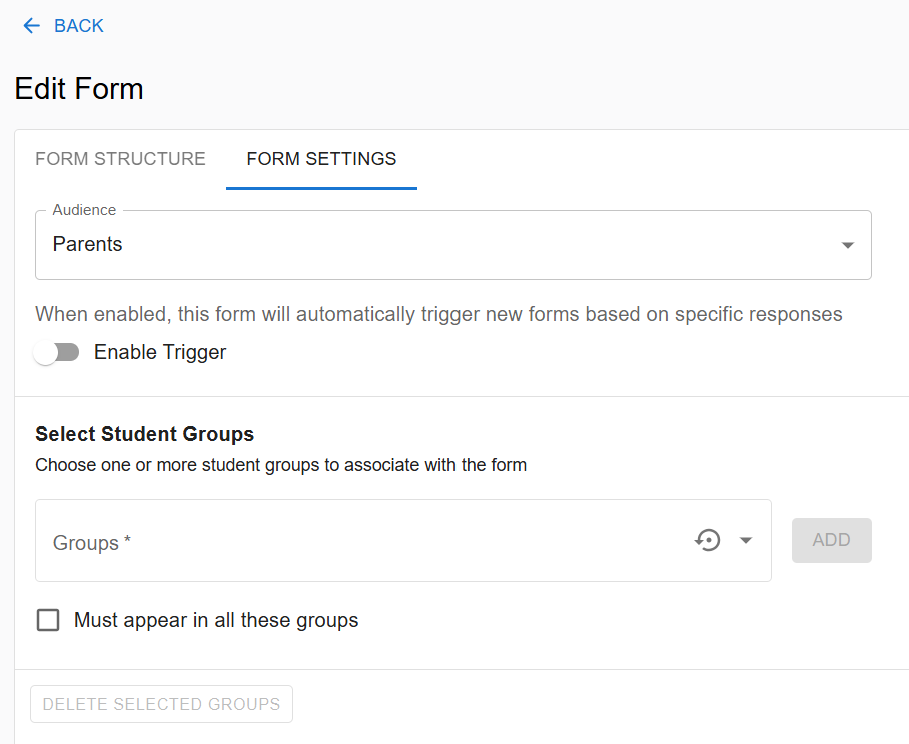
Parents (For Child Completion) #
Allows the form creator to assign groups of students to a form, or assign students individually. The form will be sent to the contacts of selected students who have parental responsibility. It is also possible to configure the form to “Allow multiple submission”, in this case the form request email notification will not be sent and the form will be available for parents on the student profile (Notifications forms section) where it can be submitted multiple times by the parent. “Require both parents to complete the form” triggers individual form requests for each parent.
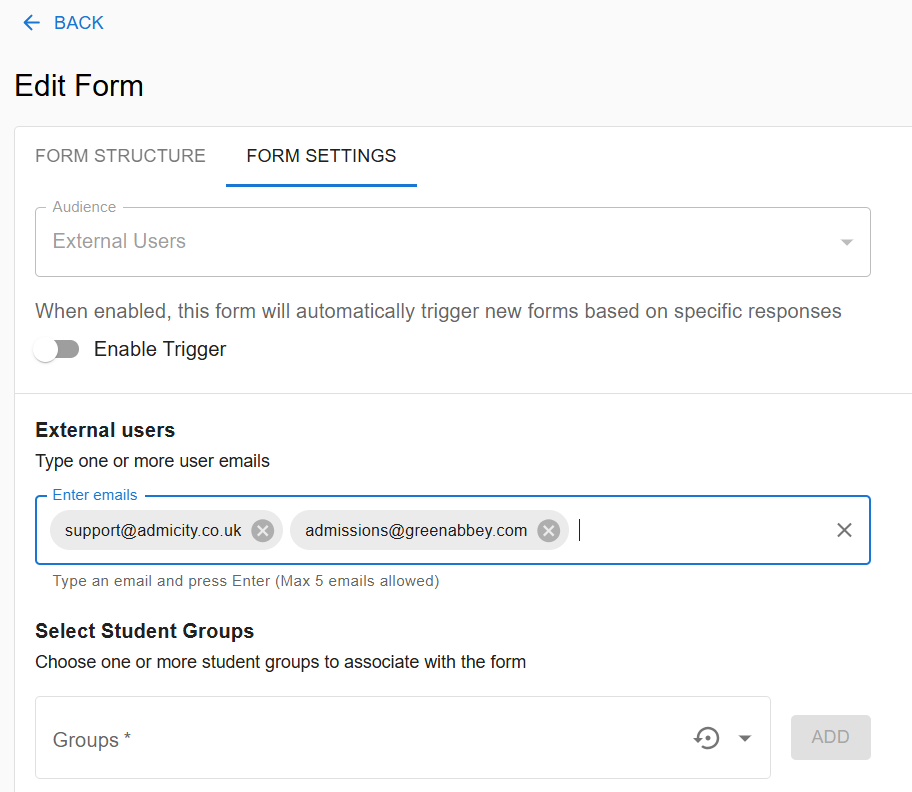
External Users #
Allows the user to assign the form to up to five external users. This functionality can also be used to add staff members to workflow forms, as staff profiles are not yet integrated with Admicity (this feature is coming soon). This is useful for parts of the admissions workflow that require input from school staff, and when organising school trips that require a staff member to complete a risk assessment of staff volunteer form.
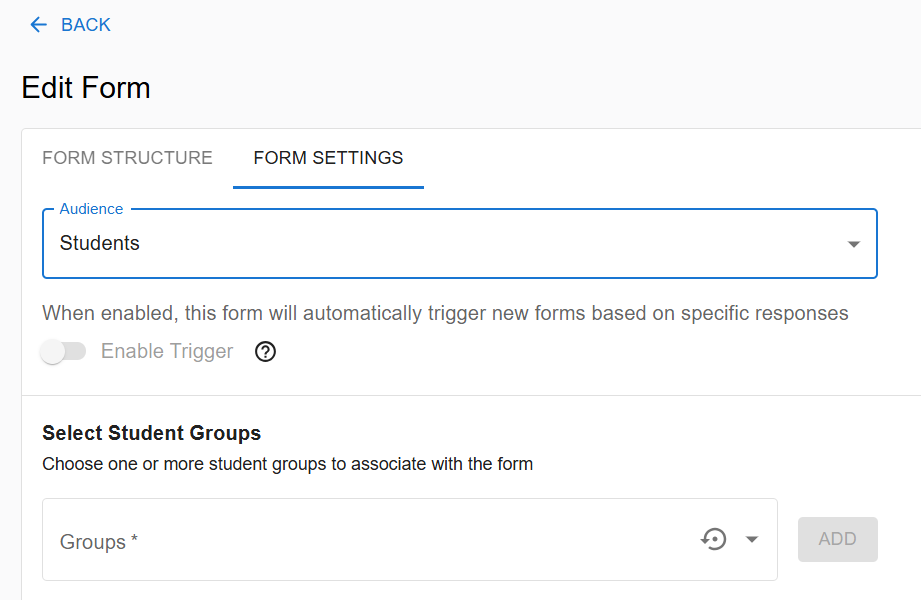
Students #
Allows the user to assign the form to students or groups of students. This type of form will be sent to the student directly if he/she is registered in the system.
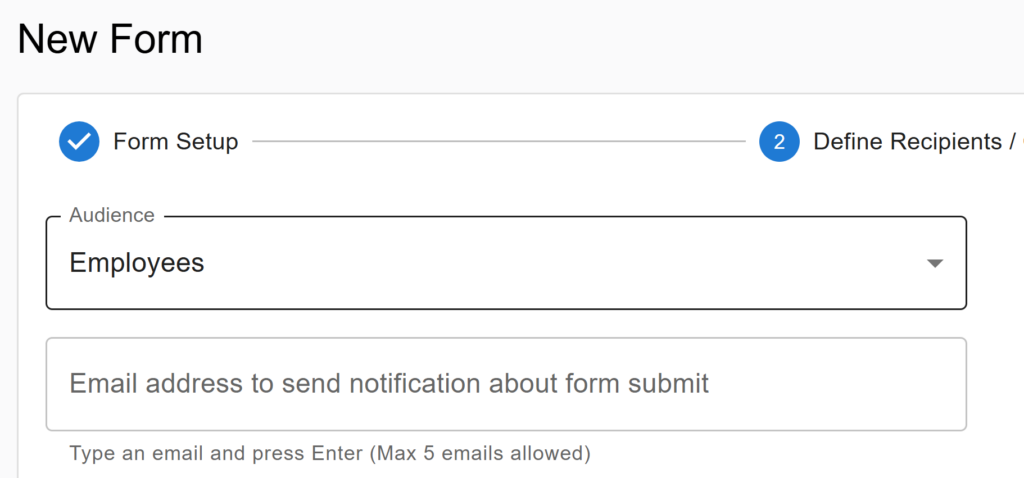
Employees #
Allows the form creator to assign groups of employees/staff to a form, or assign them individually. The form will be sent to the employees/staff directly.
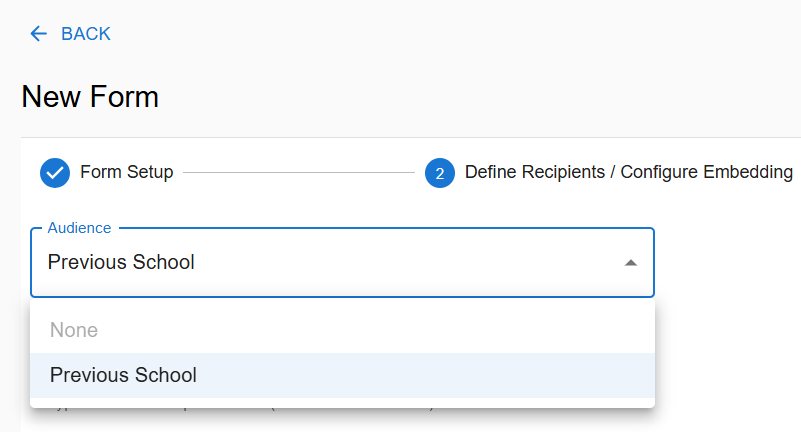
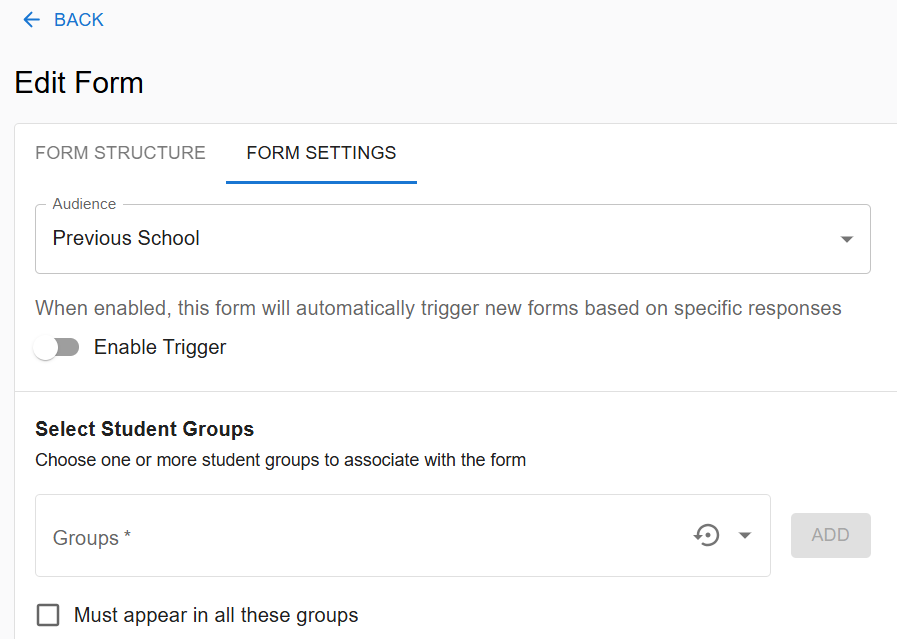
Previous School #
Allows the user to assign the form to the student or group of students’ previous school. This type of form will be sent to the feeder school directly from the information provided by the parent on the application form.
The template Blank Form – Previous School Form Templates must be selected to enable this or any form with Transition type.
Access Level #
There are two levels of access the form can have, Private or Public.
If set to Private, the form can only be responded to by someone with an Admicity account or permission to create one (for example, a parent with an Accepted or On-Roll child will have or is permitted to create an Admicity Parent Account, or a member of your school staff will have a Member of Staff or an Employee account).
If set to Public, forms sent to external recipients, feeder schools or parents with a child at Applied or Offered status, who do not have another child already attending the school, will have access to Admicity in a limited way to view and submit the specific form(s) assigned to them.
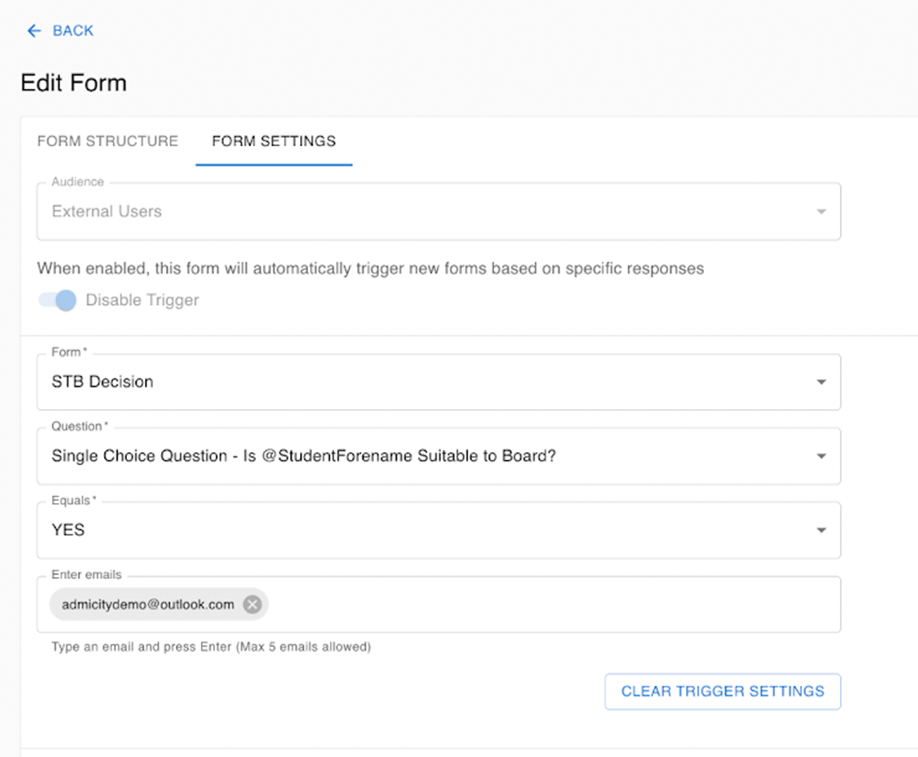
Adding Trigger Settings #
These are used to connect a form to the response of a previous form in order to create different branches of a workflow. The example below is a trigger form linked to the YES response of the decision of whether or not an applicant is Suitable to Board. A different trigger form will be linked to the NO response to this question.
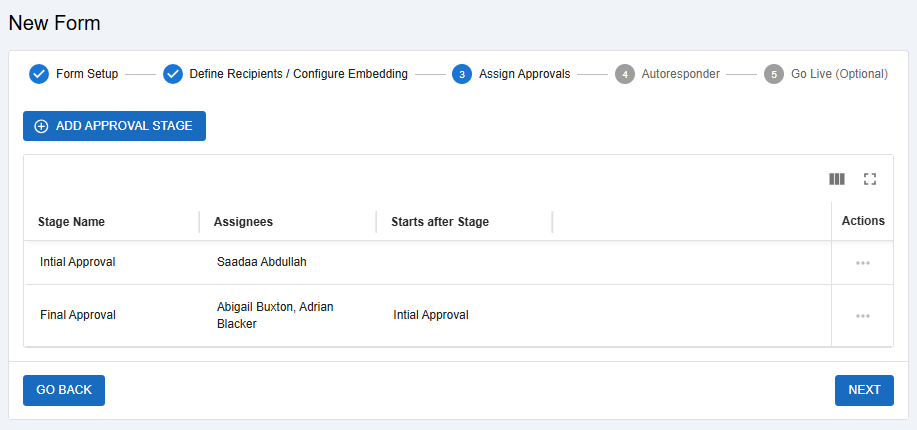
Step 3 – Assign Approvals #
This is optional and only shows up on form types other than Shareable or Application.
If no approval is needed then simply click next or save the form. If the form does need an approval workflow, click to add an approval stage.
After naming the stage, there is a selection box as to whether the stage depends on another one. If it is the first stage, there will be none to select from and you can add the assignee/s for approval.
If it’s not the first stage, it is mandatory to depend on a previously created stage where it is designed to go through one-by-one after the previous stage has been approved.
Once the stages are created they are saved and you can navigate to the next step of the form creation workflow or click Actions to edit or delete them.
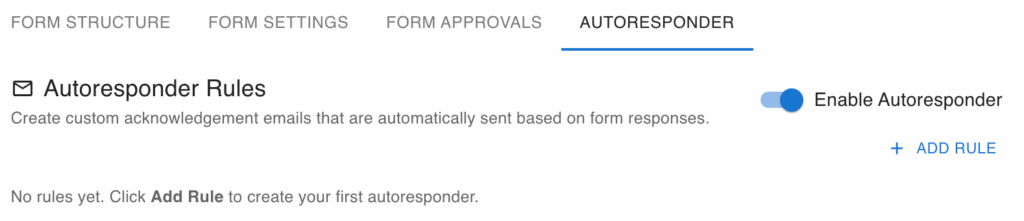
Step 4 – Autoresponders #
The Auto Responder setting allows you to configure an automatic email reply that will be sent to users upon form submission.
Step 5 – Go Live (Optional) #
In the final step, you can choose to make the form live, making it available for submissions immediately.
Once the form is activated the notification email is sent to all assigned persons. Please note that the system uses text from the first component on the form to display in the recipient’s email notification, if the component type is Notes. Then, the email notification will be: